PatternMaker macros have been programmed using the
Scandinavian pattern drafting system. Therefore you need to use the
 Scandinavian
default measurements
for grading the patterns you have drafted with it.
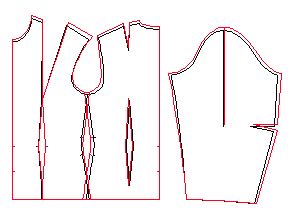
Run the basic bodice macro in two sizes, one smaller
(e.g. size 40) and one the next bigger (size 42). Position the pattern
pieces so that they meet at CF and CB lines and at hem. Then draw
the grading arrows from the vertices of the smaller size to the corresponding
vertices of the bigger size. Use snap to end point to be exact (CtrlF3).

You have to use the  Scandinavian
measurements
, other standard measurements sets might not have all the measurements
needed. To convert the Scandinavian sizes into the American ones,
compare the bust circumference measurements.
Follow the instructions below:
Run the basic bodice macro with the default measurements
(Scandinavian 42) on layer 1. Before running the macro change layer
1 to be the current layer. Click on the black box at the top part
of the screen with Layer0 text on. Then click in the current column
of layer 1 in the dialog box opened. Click "Done" to accept
the choice.
Then run the basic bodice macro with the measurements
for Scandinavian size 40 to layer 0. Use the measurements in the attached
table. Before running the macro change layer 0 to the current layer.
Move the pattern pieces so that they meet at the CF
and the CB lines and at hems. Move the sleeve pieces so that they
meet at the left side cuff vertex. Remember to choose also the center
line of the sleeve when you do the moving.
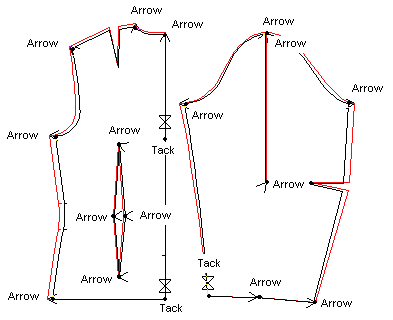
Draw grading arrows from
the vertices of the smaller size to the vertices of the bigger
size. First point the vertex of the smaller size with the left button
of the mouse and accept the choice with the right button of the mouse.
Then point the corresponding vertex of the bigger size with the left
button of the mouse and accept the choice with the right button of
the mouse. Use snap to end point to be exact (CtrlF3). It is enough
to add grading arrows to the corners of the pieces.

E.g. in the back piece you should add grading arrows
to the following vertices:
-
Back side hem vertex
-
Armpit vertex of the armscye
-
Shoulder tip at the armscye
-
Shoulder vertex at the neck opening
-
Back neck point at the neck opening
Add grading tacks to the following vertices of the
back piece:
Add grading arrows to all vertices of the back waist
dart.
![]() Site
Map
Site
Map


