|
PatternMaker
Sewing projects
Women's Camisole
To downlaod and buy macros, please go to the PatternMaker Website.
Patterns
Draft
patterns for camisole using women's basic bodice as basis. Choose
the dart option to side seam.
These patterns can only be used for camisoles sewn of
elastic fabrics. If you are going to sew the camisole of non-elastic
fabric, use ladies' blouse macro where you can choose among three ease
categories.
 Seams Seams
Sew the seams with
medium zigzag stitch and medium stitch length. The seams do not
need to be overlocked, if you do not want to, because lingerie jersey
does not ravel. If you own a
serger , sew seams with it.
Seam allowances
When cutting the garment pieces add a 0.7 cm (1/4")
seam allowance . After having sewn the seams trim them to their
half width.
Edgings
Top edge of camisole: Cut 5 cm (2") wide binding strip from
knit fabric crosswise grain. Machine baste the strip to the right side
of the of the garment right sides together. Match raw edges. Sew through
shoulder straps on back. Start at one front corner and stop at the other
front corner. Leave some extra length at the beginning and the end of
the binding.
Fold binding over the edge to the wrong side of the garment. Sew with
3-step zigzag on the right side along the edge. Trim away excess fabric
on the wrong side of the edge. Fold excess length of the binding at the
front corners to the wrong side of the garment.
Hem: You can finish the hem the same way you finished the top edges.
Stretch binding less than at top. Overlap the binding on one side seam.
Another technique: A very neat edge binding is sewn in the following
way. Fold a 2" wide binding strip lengthwise into two wrong side
in and sew it to the wrong side of the garment's edge, raw edges matching.
Use 1/2" wide seam allowance. Trim seam allowance. Fold binding around
the edge to the right side of the garment along stitch line and edgestitch
along the folded edge. Refer to the drawing below.
If you want to binding to reduce the edge, stretch the
binding when applying it. If the binding must stretch a lot, you can edtestitch
it with 3-stitch zigzag. You can sew the edgestitching entirely on the
binding or only half of it on the binding.
If the fabric used to the edge binding is not elastic enough, sew
transparent elastic into the seam.
Hint: You can use contrasting colour fabric to the binding strip.
There are instructions of how to sew a neat bound edging also in the
 general
sewing instructions. general
sewing instructions.
Lace decorations
Use
narrow zigzag stitches and shorter than medium
stitch length when sewing
laces and lace appliqués to lingerie. Use Magic transparent
tape to hold the lace or the appliqués on the fabric, stitch close
to the edges of the lace and finally trim away fabric on the wrong side
of the garment under the lace or the appliqué. Apply lace to a
garment piece before sewing it to another garment piece.
Applying lace to corners

When applying lace to corners of lingerie garments fold
the lace according to picture. Place lace right side up on the right side
of the garment. Match the scalloped edge of the lace to the raw edge of
the garment.
Use pins in corners to shape the lace. Using narrow zigzag stitches
sew along the inner edge of the lace through tape. Trim away the fabric
under the lace on the wrong side of the garment. Finally, stitch across
the corners through layers of lace. Remove tape. Trim away excess lace
in the corners.
Applying lace to curves
Place the lace on the fabric right sides facing. Match
the scalloped edge of the lace to the raw edge of the garment.
Make clips to the lace from the inner edge, following motifs
if possible. Overlap and flatten the lace. Tape or pin to place.
Using narrow zigzag and stitch along the inner edge of
the lace through tape. Trim away the fabric under the lace. Zigzag through
overlapped layers of lace, follow motifs if possible. Remove tape. Trim
away excess lace close to stitches.
Mittered slit opening
Place the lace wrong side up on the right side of the garment. Fold
it according to picture. Use pins in corners to shape the lace. Using
narrow zigzag stitches sew along the inner edge of the lace through tape.
Remove tape.
Trim away the fabric under the lace on the wrong side of the garment.
Trim away excess lace in the corner on the wrong side. If you want to,
continue using lace at the hem, refer to the picture.
Sewing instructions for camisole
1. Apply lace to top edge of front piece
Fold front piece of the camisole along CF line. Fold lace in half right
sides together and place on the CF-line of the top edge of the front piece.
Match scalloped edges of the lace to raw edges of camisole. Cut lace along
CF line leaving 0.7 cm (1/4") seam allowance. Using narrow zigzag
sew the CF seam of the lace.
Another technique is illustrated in the drawing above.
 Unfold
front piece and lace. Tape lace on the top edge of the garment matching
scalloped edge of lace to raw edge of camisole. Sew along the inner edge
of the lace through tape. Remove tape. Cut away fabric under the lace
near stitches. Unfold
front piece and lace. Tape lace on the top edge of the garment matching
scalloped edge of lace to raw edge of camisole. Sew along the inner edge
of the lace through tape. Remove tape. Cut away fabric under the lace
near stitches.
2. Sew bust darts
Sew bust darts with zigzag or serger. Trim seam allowances near stitches.
3. Sew side seams
Sew side seams of the garment. Trim seam allowances. Fold hem allowance
to the wrong side of the garment and sew from right side with 3-stitch
zigzag and trim seam allowance.
4. Sew shoulder straps
Cut a fabric strip twice as wide as you want the shoulder strap to be
+ seam allowance. Fold the strip in half lengthwise wrong side up and
sew the seam with narrow zigzag or serger. Trim seam allowance if necessary
near stitches.
The easiest way to turn the tube is to use an ordinary hair pin. Cut
a small hole on fold about 1.5 cm (1/4") from one end. Insert the
pin through the hole and into the tube as in the picture. Guide the hair
pin through the strap to the other end. Trim the end where you cut the
hole.
5. Finish top edges
Remove seam allowance from the top edges of the front and the back piece
of the camisole.
Pin shoulder straps to their places on the back piece.
Cut 5 cm (2") wide binding strip from knit fabric crosswise grain.
Machine baste the strip to the right side of the of the garment right
sides together. Match raw edges. Sew through shoulder straps on back.
Start at one front corner and stop at the other front corner. Leave some
extra length at the beginning and the end of the binding.
Fold binding over the edge to the wrong side of the garment. Sew with
3-step zigzag on the right side along the edge. Trim away excess fabric
on the wrong side of the edge. Fold excess length of the binding at the
front corners to the wrong side of the garment.
6. Attach shoulder straps to front corners
Pin the shoulder straps to the wrong side of the front corners under
the folded edge binding and try the camisole on. Adjust the length if
necessary. Sew two vertical rows of narrow zigzag stitches across the
right side of the the front corners through the straps. Trim excess shoulder
straps if necessary.
6. Sew hem
Sew binding to the hem the same way you finished the top edges. Stretch
binding lightly when sewing. Overlap the binding on one side seam.
7. Sew slits


Sew mittered slits with lace to bottom of side seams. Fold lace according
to the photos, tape in place and sew with narrow zigzag along the inner
edge of the lace. Leave extra length for the lace hem allowance. Trim
away fabric under the lace and extra lace on corners. Fold lace seam allowance
to the wrong side and zigzag on right side.
Another design idea
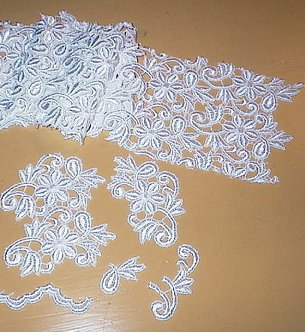
Cut one or more
motifs of lace
fabric to decorate the edges of the garment as in the other camisole.
First finish the edge with a binding strip. Then tape the lace motif on
top of the edge and sew with narrow zigzag along the inner edges of the
lace motif. Finally, trim away fabric (and the edge binding) under the
lace motif on the wrong side.
Shape the top edge of the camisole if necessary to match the shape of
the lace.
Apply a lace motif to the hem, too, like in the sample garment.
If the lace is very soft or slack, sew clear elastic to the wrong side
of the top edge of the lace. First machine baste it to the wrong side
of the lace. Stretch the elastic when basing. Then zigzag on the right
side on the elastic.
If the binding fabric is not elastic enough, you can apply invisible
elastic in the binding seam.
A couple of Internet addresses
If you have difficulties in getting fabrics and notions for lingerie,
please refer to the following websites
Spandex House
SewSassy
Clotilde
Nancy's Notions
Élan Patterns & Supplies
>Fabric.Com
| 