|
Sewing Instructions for the PatternMaker Hats/Caps Collection

To downlaod and buy macros, please go to the PatternMaker Website.
General
Sizes
The hats/caps are in most cases in 5 sizes: Children's sizes: 52 cm (20
1/2") and 54 cm (21 1/4"), women's sizes 58cm (22 7/8") and 60 cm (23
5/8") and men's size 62 cm (24 3/8").
 The
hats are on different layers. Please close the layers to hide the
models you do not need and erase unnecessary sizes. To open the layers
window use function key F11. If you plan to save the file after having
erased something, save it with another name. If you accidentally
lose part of the pattern due to saving the file, simply reinstall the
collection. The
hats are on different layers. Please close the layers to hide the
models you do not need and erase unnecessary sizes. To open the layers
window use function key F11. If you plan to save the file after having
erased something, save it with another name. If you accidentally
lose part of the pattern due to saving the file, simply reinstall the
collection.
In many cases the crown of the hat has a bit larger circumference than
the hatband or corresponding piece. When sewing the band and the crown
together, stretch the band to match the circumference of the crown. Use
ease stitching if necessary.
Fabric
You can use many different fabrics to make these hats. Experiment
with velvet, fleece, cotton, denim, fake fur, leather etc. You can also
use padded fabric if you want to. If you want a stiffer result, iron interfacing
to all crown pieces and to both pieces of the brim or bill of the hat.
You can use cardboard or plastic to strengthen the bill. Consider decorating
the crown tip with a tassel, pom pom or button.
Cutting and sewing
Cut all hat pieces on the bias to secure proper ease of movement. Sew
half of the crown pieces together and then sew the two halves of the hat/cap
together. Sew the crown pieces together from the crown top downwards.
After having sewn the seams, snip into the corners and the curved seams.
Cut the lining of the hats slightly larger in circumference than that
of the outer hat material (= use approximately 3 mm (1/8") larger seam
allowance for the lining as for the hat). Make small pleats in the lining
to match its circumference with the hat circumference.
Seam allowances
Unless indicated otherwise, all pieces are without seam allowance.
Fitting and adjusting the size
Before permanently connecting the hatband or the brim to the crown, try
the hat on and adjust the fit if necessary. If you want to, you can sew
in this seam a petersham headband. Measure the needed length of the petersham
headband winding it around your head.
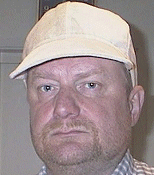
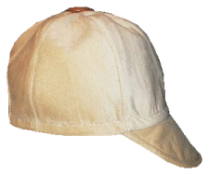
Baseball Cap
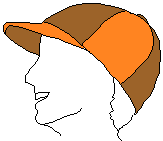
1) cut 4 pieces of the crown front/side panels and 2 pieces of the crown
back panels. Cut one copy of bias binding (seam allowance is included)
and one copy of the elastic cover (add seam allowance, as to all other
pattern pieces). Pin and sew two front/side pieces and one back piece
together right side against right side to construct a crown half. Clip
seam allowances. Then sew the other half of the crown and sew the halves
together right side against right side.
2) cut and sew the lining for the crown. Place the lining inside the
crown, wrong sides together, and baste around the edges. You can omit
the lining if you want to.
3) sew a bound edge around the cut-out opening at the back of the cap.
Clip seam allowances. You can read instructions for sewing a bound edge
in the  general
sewing instructions. Sew a fabric casing to cover a piece of elastic
for the back opening. Insert a 4-5 cm long elastic inside the casing and
anchor down both ends with a couple of stitches. Baste the covered elastic
at both sides of the back opening at a distance of the bottom seam allowance
from the edge. general
sewing instructions. Sew a fabric casing to cover a piece of elastic
for the back opening. Insert a 4-5 cm long elastic inside the casing and
anchor down both ends with a couple of stitches. Baste the covered elastic
at both sides of the back opening at a distance of the bottom seam allowance
from the edge.
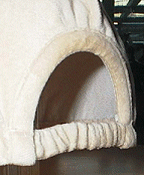
4) cut two pieces of the bill. Cut one copy of the bill from cardboard
or plastic without seam allowances. Sew bill pieces together right sides
together, clip seam allowances and turn right side out. Place the cardboard
or plastic insert inside the fabric bill and baste along the inner curve
as close to the edge of the card as possible. Edgestitch the outer edge
at a presser foot width from the edge through cardboard.
5) sew the bill to the crown, with the CF of the bill matching the CF
seam of the cap. Overlock the bill/cap seam and the bottom edge of the
cap. Sew petersham headband to the bottom edge of the cap from back opening
to back opening. Covered elastic is attached at the same time. Fold the
petersham under at both ends. Fold in and iron the petersham inside the
cap.
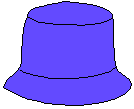
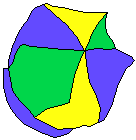
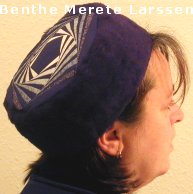
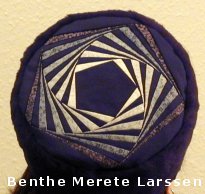
Pillbox
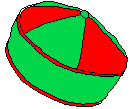
There are two kind of top constructions you can choose from: peaking
(cut 6 panels) and flat (cut 1 circle)
1) use padded fabric or sandwich wadding between the fabric and the lining.
Cut and sew together the crown pieces, three and three to make the crown
halves and then sew the halves together.
2) cut and fold the band in half widthwise with right sides facing and
sew the back seam. Sew the band to the crown with back seam matching with
one of the crown seams. Sew a piping cord into the seam.
3) make the liningin the same manner. Sew the lining and the hat together,
rights sides together, at the bottom edge of the hat, leaving an opening
for turning the hat right side out. Sew a piping cord into the seam. Turn
the hat right side out and hand stitch the opening. Iron. Topstitch along
the bottom edge near to the piping.
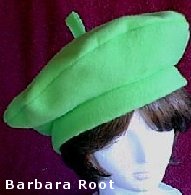
Beret
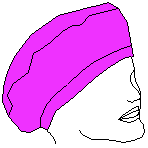
1) cut one copy of each hat piece. Iron interfacing to the hat band if
needed. Sew the top piece to the side piece.
2) cut and sew the lining for the crown. Put the lining inside the hat
and baste along the bottom edges. You can omit the lining if you want
to.
3) fold the hat band in half widthwise with right sides facing and sew
the back seam. Sew one edge of the band to the crown right sides facing.
Overlock the other edge of the band and fold half of it under. Topstitch
in the ditch on the right side.
Beret with a bill and earflaps
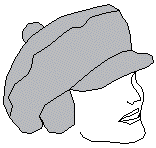 1)
cut one copy of the hat top and one copy of the side piece on fold, two
copies of the bill and 4 copies of the earflaps. Sew the top piece to
the side piece. 1)
cut one copy of the hat top and one copy of the side piece on fold, two
copies of the bill and 4 copies of the earflaps. Sew the top piece to
the side piece.
2) cut and sew the lining for the crown. Put the lining inside the hat
and baste along the bottom edges.
3) make the bill and the earflaps. Baste them to the bottom edge of the
hat upside down and right sides together. Sew in a petersham headband
in the needed length to join the crown, the peak and the earflaps and
to finish the bottom edge of the hat at the back. Fold in and iron the
petersham inside the cap. If the hat needs easing sew some of the petersham
at the back of the hat to form a casing and insert elastic into it.
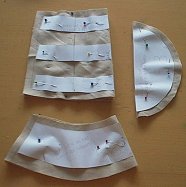
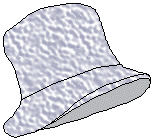
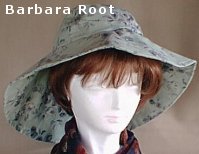
Brim hat
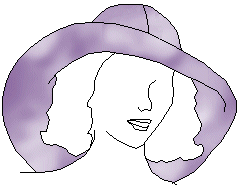
There are two alternative brims for this hat, symmetrical and asymmetrical.
1) cut 4 copies of the crown panels and 2 copies of the brim. Sew together
the crown pieces, two and two to make the crown halves and then sew the
halves together.
2) cut and sew the lining for the crown. Put the lining inside the hat
and baste along the bottom edges. You can omit the lining if you want
to.
3) sew the brim pieces together at the outer edge, right sides together.
Turn the brim right side out and edgestitch. Pin the brim and the crown/lining
together with right sides together. Sew in a petersham headband in the
needed length to join the crown/lining and the brim. Fold in and iron
the petersham inside the hat.
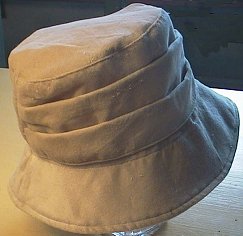
Sports hat
1) cut one copy of the hat top and the side panel and two copies of the
brim, all on a fold. Sew the back seam of the side panel. Sew the top
and the side panel together, right sides together. Clip the seam allowances.
2) cut and sew the lining for the crown. Put the lining inside the hat
and baste along the bottom edges. You can omit the lining if you want
to.
3) sew the brim pieces together at the outer edge, with right sides together.
Turn the brim right side out and edgestitch. Pin one edge of the brim
and the crown/lining together with right sides together. Sew. Overlock
the other edge of the brim and topstitch in the ditch on the right side.
In the photos to the right a modification is illustrated.
 Cloche
hat Cloche
hat
Cloche is the French word for bell.
Sew this hat of fake fur according to the instructions for the sports
hat.
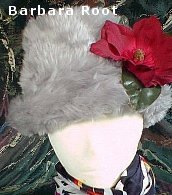
 Castle
hat Castle
hat
1) cut 6 pieces of the crown panels and 1 piece of the hat band. Sew
together the crown pieces, three and three to make the crown halves and
then sew the halves together.
2) cut and sew the lining for the crown. Put the lining inside the hat
and baste along the bottom edges. You can omit the lining if you want
to.
3) fold the hat band in half widthwise with right sides together and
sew the back seam. Sew one edge of the band to the crown and the lining,
right sides together, and with the back seam matching with one of the
crown seams. Overlock the other edge of the band and fold half of the
band under. Topstitch in the ditch on the right side.
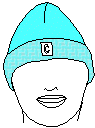
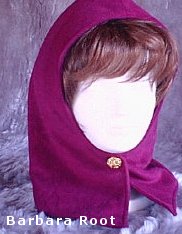
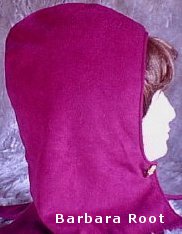
Hood
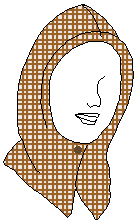
1) cut 4 copies of the hood pieces. Sew two and two together, right sides
together, along the top and back edge. Stop at the mark at back. Place
one hood inside the other with right sides together and sew along the
back, bottom and front edges. Leave an opening for turning the hood right
side out. Clip seam allowances.
2) turn the hood right side out and edgestitch along back, bottom and
front edges.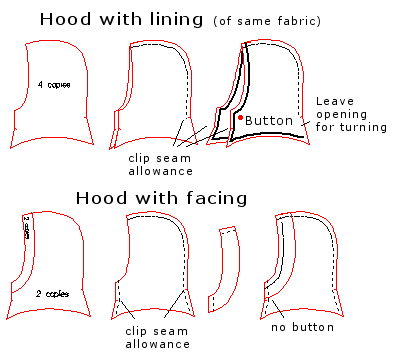
3) Topstitch the front edge at a distance of 2.5 cm (1") from the edge
to construct a casing. Stop at about 5 cm (2") from the front edge. Insert
elastic in the casing if needed and anchor at the ends of the casing.
4) Sew a button and a buttonhole at the front corner of the hood.
5) Sew a hood with facing according the picture.
Stocking cap
Sew this model of elastic fabric only.
1) Cut one copy of the cap on fold.
2) Sew the front dart of the cap with right sides together. Sew the back
seam and the back dart, right sides together. Start from the top and stop
at the notch mark. Sew the rest of the seam with wrong sides together.
Finally, sew the top seam in one continuous seam.
Overlock the bottom edge of the cap. Fold twice or roll the bottom edge
of the cap on top of the cap. Attach a badge if you want to.
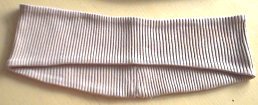
Ear warmers
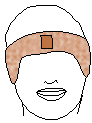
Sew this model of rib knit or other elastic fabric.
1) cut one copy on fold.
2) sew bottom edge right sides together. Turn right side out and steam.
3) sew some of the back seam - as much as you can - right sides together.
Fold in and sew with hand stitches the rest of the back seam. Steam. Attach
a badge if you want to.
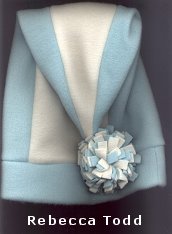
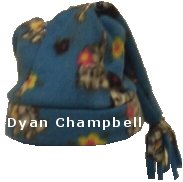
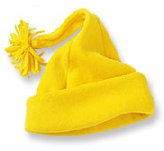
Santa Claus
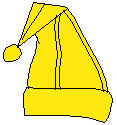 Sew
this model of knit or other elastic fabric. Sew
this model of knit or other elastic fabric.
1) Cut four copies of the crown panels and one copy of the band on fold.
2) Sew the crown panels together with right sides together. Fold the
band in half widthwise with rright sides together and sew the back seam.
3) Fold the band in half lengthwise and place upside down at the bottom
edge of the crown with raw edges matching and with the back seam of the
band matching with one of the crown seams. Sew and overlock. Fold half
of the band up.
Make the pom pom of two strips of polar fleece with 1/2 inch cuts
on both long sides. Take an extra 1/2 inch strand of polar fleece with
the stretch going lengthwise and stretch it until it forms a cord. Rolled
up the doubled polar fleece into a tight coil and tied the cord tightly
around the middle until it is puffed up into a ball.
Photo gallery
Beret, Cloche and Sports Hat
Hood and Santa Claus
Pillbox
Brim hat
Baseball Cap
Stocking Cap
Santa Claus and Ear Warmers
| 