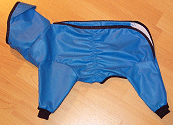
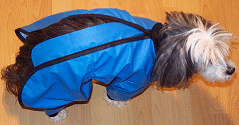
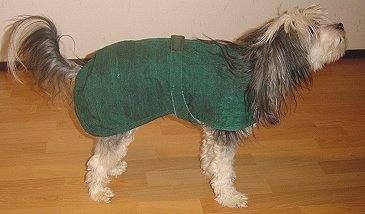
PatternMaker Macro: Dog's Suit
Measuring and Sewing Instructions
To downlaod and buy macros, please go to the PatternMaker Website.
Measuring
Take the measurements along the dog's body according to the picture.
Do not add ease. The measurement from the groin to the sitting bone is
taken along the thigh curvature from groin to sitting bone (under the
tail). It is the circumference of the thigh at this place minus the inside
of the thigh.
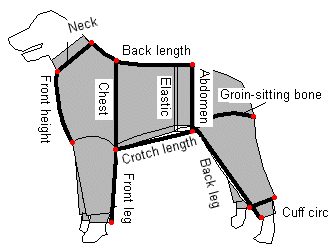 The
front height and the leg measurements as well as the cuff circumference
are garment measurements. Measure them as you want them to be in the ready
garment. When measuring the leg lengths, do not subtract the height
of the cuff ribbings, the macro does it for you. The
front height and the leg measurements as well as the cuff circumference
are garment measurements. Measure them as you want them to be in the ready
garment. When measuring the leg lengths, do not subtract the height
of the cuff ribbings, the macro does it for you.
You will be asked to enter the height of cuff ribbings in the measurement
dialog box. If you do not want to sew ribbings to the cuffs, enter this
measurement as zero. If you choose the "No hood" option, the
macro drafts a 2*6 cm:n (2 * 2 3/8") high ribbing for the neck opening.
There is a PatternMaker measurement table for dogs. Use
it to create a measurement table for your own dog. The measurement table
file is in the same folder than the macro. To read about creating and
using measurement tables click here.
 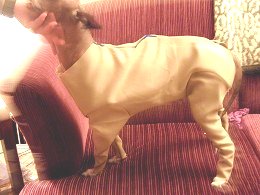
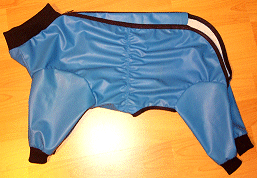
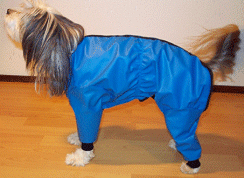
Pictures: Sandy Ericsson
and Barbara Root
IMPORTANT! Measuring a dog is not always easy. Therefore, always
make a muslin first to check the measurements. Change the measurements
if needed. If the fabric for the muslin is different - e.g. thinner than
the fabric used to the final garment, take this into consideration when
fitting the muslin on.
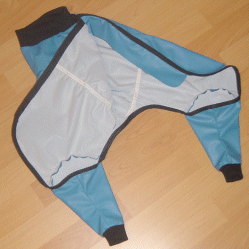
 Fabric Fabric
You can use different kind of fabrics to sew the suit, from thin elastic
to thick non-elastic fabrics. Choose the ease option according to the
fabric. Use minimum ease for thin fabrics, normal ease for medium
thick fabric and maximum for thick wool fabric, artificial fur or padded
fabric. If the fabric is stretchy, measure the stretching in
it and type the horizontal or vertical scaling factors when prompted.
Scaling factor is asked separately for the main fabric and the ribbing.
To read about how to measure the stretching in the fabric, click
here
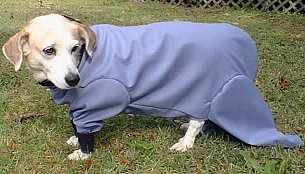
Picture: Susan Smith
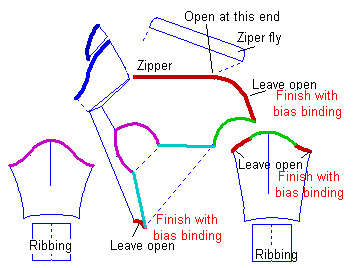
Cutting
Cut the garment pieces on folded fabric. Cut the abdomen piece and the
hood on fold.
Remove seam allowance from the edges which will be finished with bias
binding: back seam, top seam of the rear part, top edges of the back legs
inside parts and back edge of the abdomen piece
Sewing
Sew the abdomen piece and the body pieces together, leave the back seam
(zipper opening) and the rear seam open. Sew the leg seams. Sew legs to
their places according to notch marks. Leave the inside parts of the back
legs open. Finish the back seam and the inside edges of the back legs
as well as the rear end of the abdomen piece with bias binding
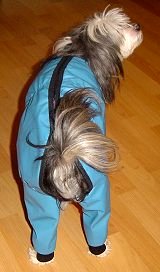
Sew zipper to the zipper opening (neck - tail base), closed
end towards neck. Leave an opening at the neck end for the leash.
Sew zipper fly parts together right side against right side. Leave the
straight edge open. Turn the fly piece right side out and edgestitch.
If you sew the suit from fabric which does not ravel, you can if you want
to, sew the fly piece of single fabric. Sew the fly piece below one side
of the zipper along the ditch.
 Sew
zipper fly parts together right side against right side. Leave the straight
edge open. Turn the fly piece right side out and edgestitch. If you sew
the suit from fabric which does not ravel, you can if you want to, sew
the fly piece of single fabric. Sew the fly piece below one side of the
zipper along the ditch. Sew
zipper fly parts together right side against right side. Leave the straight
edge open. Turn the fly piece right side out and edgestitch. If you sew
the suit from fabric which does not ravel, you can if you want to, sew
the fly piece of single fabric. Sew the fly piece below one side of the
zipper along the ditch.
Sew elastic to the inside of the garment with zigzag around abdomen according
to marks in the patterns. If you want to you can sew a casing for the
elastic. Feed the elastic to the casing and fasten at both ends. You can
replace the elastic with a draw string which you feed into the casing
to regulate the fit of the garment. In this case you should, however,
replace main part of the draw string with elastic to make the garment
more flexible and comfortable to wear.
To be able to feed the draw string in the casing, sew button holes to
the garment at both ends of the casing before you attach the casing. Or
you can feed the draw string to the casing through its ends and bind the
string inside the garment.
 Sew
seams of the cuff ribbings, fold ribbings in two wrong side inside and
sew them to the leg cuffs. Stretch them when sewing. If you sew a ribbing
to the neck opening, sew it to its place the same way. Sew
seams of the cuff ribbings, fold ribbings in two wrong side inside and
sew them to the leg cuffs. Stretch them when sewing. If you sew a ribbing
to the neck opening, sew it to its place the same way.

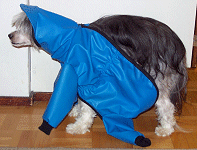
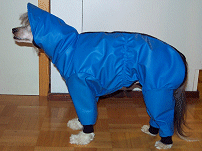
Hood
If you sew a hood to the suit, replace the neck ribbing with it. The
front edge of the hood is finished with bias binding. The hood cannot
be too tight, otherwise the dog may not approve it- If needed, feed elastic
inside the bias binding.
Sew the visor brim pieces together right side against right side. Turn
the visor brim right side out and edgestitch along the curved edge. Overlock
the straight edge. If the fabric is thin you can iron interfacing to one
or both visor brim pieces. Sew the visor brim under the front edge of
the bias binding of the hood along the ditch.
You can use ribbing for the hood. You can leave the visor brim away.
If you sew the visor brim, you can - when the weather is good, turn it
on top of the hood so that it points towards the back of the dog. That
way the visor brim avoids less the dogs visual feald.
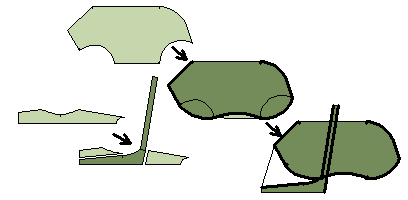
Cape
If you want to sew a cape and not a complete suit, alter
the patterns according to the drawing and the pictures below.

I want to express my special thanks to Rebecca
Todd, Sterling, Virginia, USA who kindly shared her knowledge and
experiences in sewing hoods to dog suits with me. I also thank all the
PatternMaker users who participated in this project by testing the macro
when it was being programmed.
| 